Dev Containers on Windows 11 with NextJS
Recently, someone mentioned that they use "dev containers" at work. Although I hadn't heard of them at the time, the name sounded intuitive, so I had a rough idea of what they might be. I got really interested because I had a little side project in mind: This blog developed with Next.js. However, on my new Windows 11 install, I hadn't set up any of my dev tools or runtimes. So I thought this would be the perfect opportunity to keep my dev environments simple, clean, and separated.
What are Dev Containers
The name is pretty intuitive, as I said. A development container is a containerized and customizable development environment that helps to separate runtimes, tools, and codebases. In other words, nothing is installed "locally"2, but in appropriate containers. There are many advantages to that, but here's one in particular - consistency. The tech stack stays the same no matter what updates or other tools and software I install on my machine. Dev containers have their own open specification containers.dev and many tools that support them, including VS Code with its own extension. The "Code with Engineering Playbook" github.io page describes the extension as follows:
Dev Containers are a VS Code feature that allows developers to package a local development tool stack into the internals of a Docker container, while bringing the VS Code UI experience with them 1.
Just what I needed, so let's get started.
Installation
Full of vigor I started installing. First Docker Desktop:
winget show docker
winget install "docker desktop"
Docker on Windows can either run with a Hyper-V or a Windows Subsystem for Linux (WSL) 2 backend. I didn't dive too deep into the differences, but my understanding is that Hyper-V is the more complex, but also more versatile solution. While in a personal environment, WSL2 will suffice and even provide a more seamless integration with Windows regarding accessibility and performance.
For WSL2 I also needed to install a Linux distribution
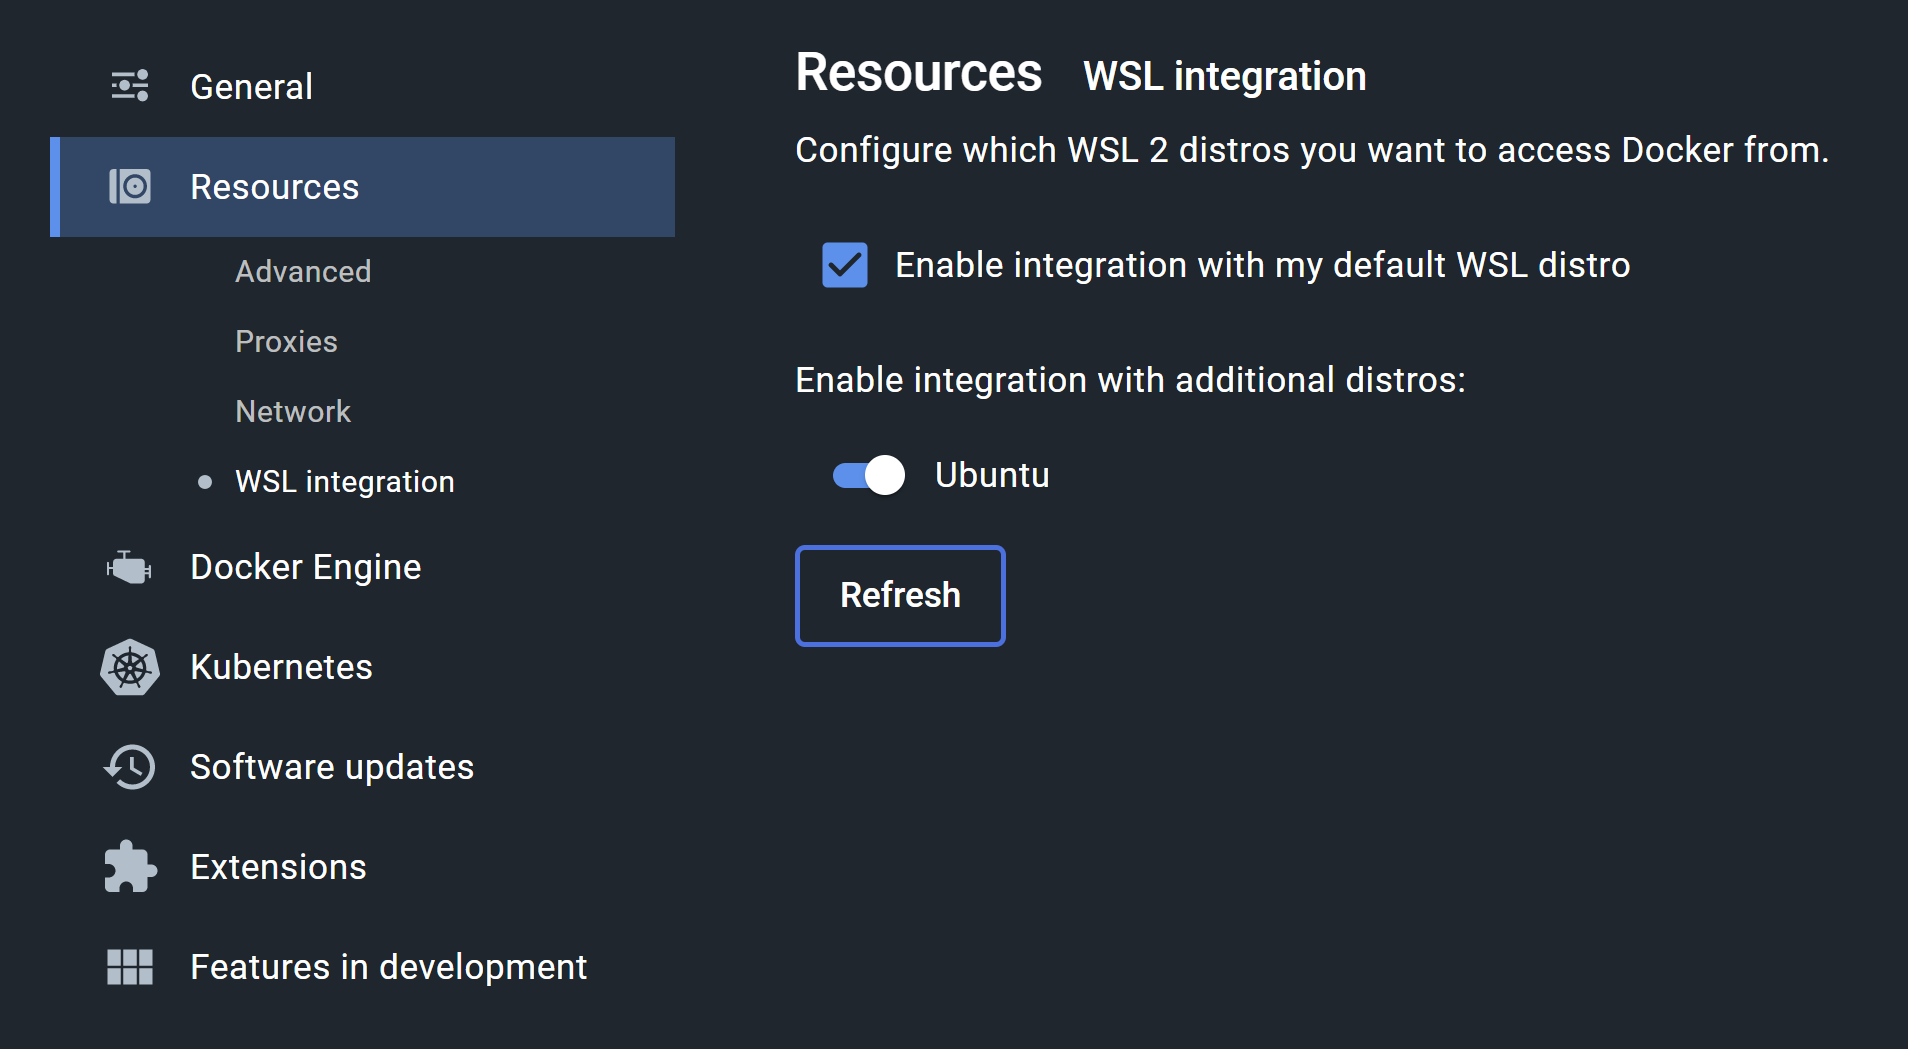
wsl --install -d <Distribution Name>The default distro will be Ubuntu if you omit the -d parameter. But if you decide to go another route, you have to make sure that you can access the docker service from that distro by going into the settings in Docker Desktop under Resources > WSL Integration and enabling your distro of choice.
Then it was time for VS Code:
winget show vscode
winget install vscode
...with the aforementioned Dev Containers extension.
Dev Containers Extension
So I opened up a freshly created folder in VS Code and used the extension command "Dev Containers: Add dev container configuration files..". This brought up a list of container templates. Here you can choose a clean Alpine base with Git installed or go with preinstalled runtimes, tools, SDKs, etc. Since I needed a JavaScript runtime I went for the "Node & Typescript" option skipping any additional features proposed afterwards.

This creates a .devcontainer folder with a minimal devcontainer.json inside it which only declares the docker image to use. You could provide your own Dockerfile or use Docker Compose to spin up a multi-container environment. And/or you could add your favorite VS Code extensions under "features", so they will be installed automatically when the container is created the first time.
Tipp
In case you don't want to declare your extensions in the project, e.g. because of collaborations, there is a VS Code extension setting for local default extensions:
"dev.containers.defaultExtensions": [
  "github.copilot"
]
These will be installed in all your containers.
And of course, this can get as complex as you want it to but for now, the simple start configuration will suffice. Subsequently, I used "Dev Containers: Reopen in Container", et voila, my folder was opened in a containerized environment with the VS Code UI. That should be it and I'm ready to go!
Up Next
You know, sometimes life can be unpredictable and full of unexpected obstacles. However, these are the moments we grow as a person and it's important to stay focused and... no, yeah, I hit some speedbumps.
Since I'm familiar with React but have never done anything with Next.js I thought it would be a good idea to start with a simple example app. Fortunately, Next.js offers a beginner-friendly but elaborated tutorial. Unfortunately, it appears to be a little outdated, since it doesn't include the brand new "App Router" -- and still uses the "Pages Router" -- which resulted in a little confusion when browsing the documentation or looking things up in general. But overall it still explains the concepts used very well and I can still recommend it.
No Capitals Allowed
I used the command provided in the tutorial to create a new Next.js project based on their starter template
npx create-next-app@latest nextjs-blog --use-npm --example "https://github.com/vercel/next-learn/tree/main/basics/learn-starter"but since I was already in the folder which I wanted to be the root, I replaced the "nextjs-blog" name parameter with a dot and was greeted with the following message:
Could not create a project called "YourName" because of npm naming restrictions:
    - name can no longer contain capital letters
Alright, I will rename my folder even though this messes with my PascalCase naming pattern.
Only Empty
I tried again and now have been informed of the following:
The directory yourname contains files that could conflict:

.devcontainer/

Either try using a new directory name, or remove the files listed above.
I thought of Next.js being a bit too cautious here, and since I'm pretty stubborn, I decided to create the project in a temporary directory and then move it out from there. Which worked! Now, when I run npm run dev, my browser opens up and I'm greeted with the Next.js welcome page.
Cold Reload
This page also cordially invites me to play around with the pages/index.js, which I promptly wanted to try out.
And nothing happend. Not even on a browser refresh. I had to restart the development server to see the changes I made. This could not be the intended way and indeed, it isn't. Usually Next.js supports Hot Module Reload (HMR), which allows the dev server to detect changes and reflect them immediately. But there appears to be an issue when mounting files in a Linux container from a Windows file system3.
The solution is to move your source files to the Linux file system6. This I could have done via the command line or, what I did, I opened my Ubuntu bash, navigated to the folder where I wanted my repository to live and ran explorer.exe . (mind the dot). Now I could simply pull over the repo.
Shady Owner
If you have set up git already, you may come across the following error message:
fatal: detected dubious ownership in repository at '//wsl.localhost/Ubuntu/home/username/.../yourname'

To add an exception for this directory, call:

git config --global --add safe.directory '%(prefix)///wsl.localhost/Ubuntu/home/username/.../yourname'
or  git config --global --add safe.directory *
This is because you're trying to access a repository residing on Linux from a Windows app.
You could use wsl git instead of git everywhere or use the proposal and add your repository to the safe directories. 4
Who Are You Even
Since setting up git is rarely a bad idea, I would recommend it even for smaller tutorials. And if this is your first time working in the WSL git wants to know who you are on commit:
Author identity unknown

*** Please tell me who you are.

Run

git config --global user.email "you@example.com"

git config --global user.name "Your Name"

to set your account's default identity.

Omit --global to set the identity only in this repository.

fatal: unable to auto-detect email address (got 'node@8722d07ef2fd.(none)')
Normally the dev container adopts the git config from its host, and it does so here too, but in this case this means the Linux distro rather than Windows5.
Conclusion
Finally I was able to start working on the Next.js tutorial. In the future, when working with dev containers, I will keep the following two points mind:
- Use the Linux file system for your source files
- Use lower case names for your projects when working with npm
Running containers on Windows for development is made easy thanks to the open container specification and the Windows subsystem for Linux. Now my development environments live inside the repositories for which they are actually used, which keeps my devices neat and clean and invites to experiment more with other tech stacks. And now all another device really needs to start working on it is VS Code and a container runtime.
Thank you for reading and happy coding!